GeoProc.com
GeoProc.com

Styling with different user-defined symbol shapes and sizes linked to table fields

This is a QGIS 3.x workflow to style a point vector layer with symbols of different shapes and sizes, depending on fields values.
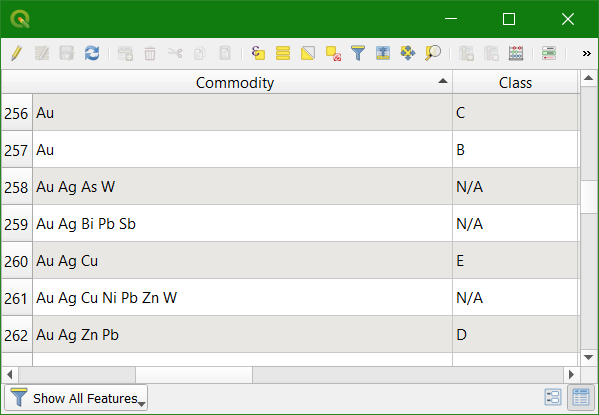
Objective:

Vector file has those two fields "Commodity" and "Class":

The goal is to define symbols shape using "Commodity" field and use "Class" field to set symbol size.

"Commodity" field can have more than one commodity name as seen above. A function will be created to only take the first name into account. "Class" has values: A, B, C, D, E, N/A. Symbol size for 'E' and 'N/A' will be the same. Sizes will be set from 10 mm for 'A' down to 2 mm for 'E' in decrement of 2 mm. Also, at scale greater than 1:500 000 symbols size will be doubled.


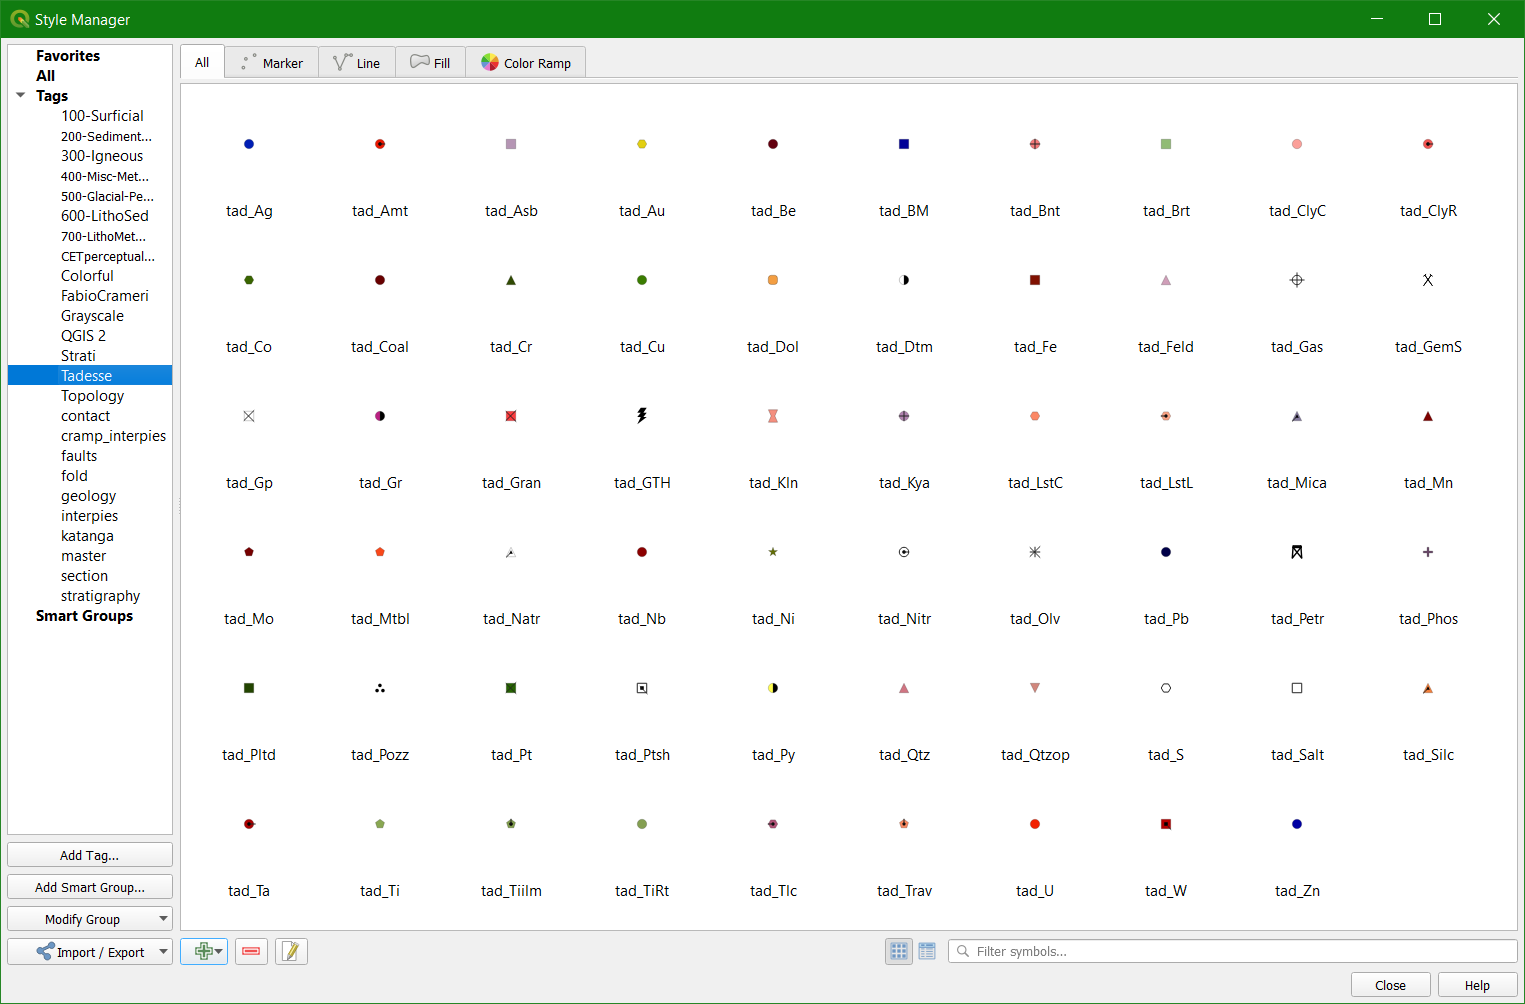
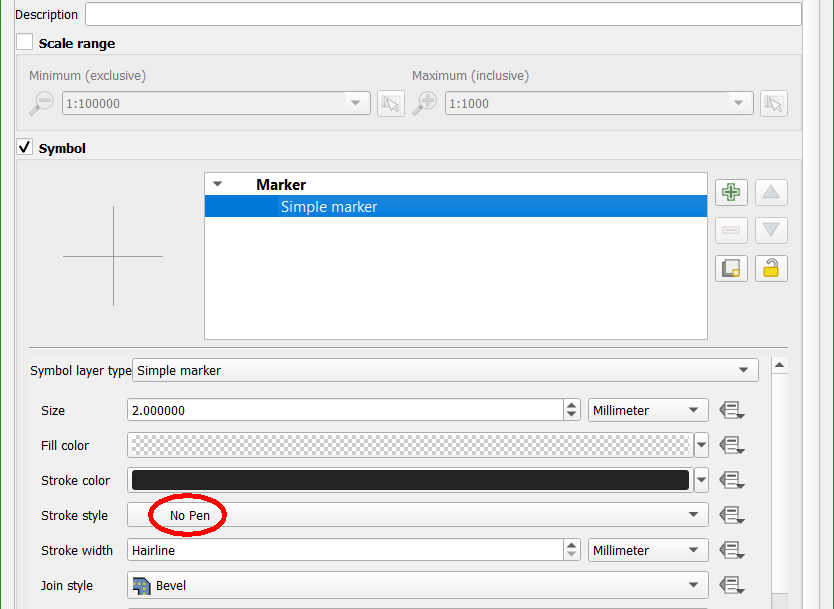
Symbols are already created and saved into Style Manager (Tadesse tab).

We will define a relation between value of "Commodity" field (e.g. 'Au Ag As W') and symbol name (e.g. 'tad_Au') in order to use that symbol with that field value.

How to do it

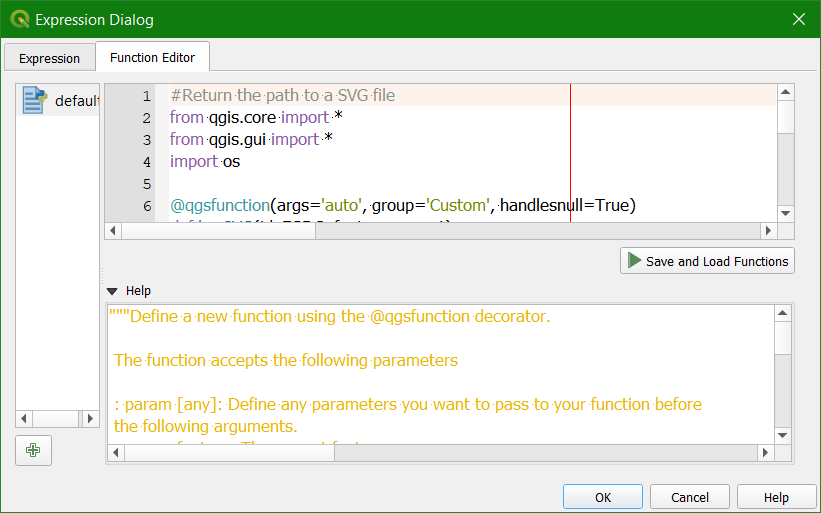
In QGIS this is done through "Rule-based" styling and custom functions. A dummy rule is defined to allow for customisation of its sub-rule. The sub-rule will associate fields in the vector table to symbol name (its shape) and symbol size.

First, we define the relation linking "Commodity" field and symbol name (and its shape):

  • Select a vector layer in Layers Pane
  • Click in toolbar to open Field Calculator
  • Click "Function Editor" tab
  • Add following function at end code window:
  • @qgsfunction(args='auto', group='Custom', handlesnull=True)
    def Tadesse(commo, feature, parent):
    	return  'tad_' + commo.split(' ')[0]

    Obviously, this function will need to be customised for other cases. The point to remember here is that the function maps a value in a field to a symbol name present in Style Manager.

  • Click "Save and Load Functions"
  • Close dialog


Set-by-step

  1. Select layer in Layers Pane and open its Layer Properties window
  2. Click "Symbology" tab
  3. Select Rule-based from top dropdown
  4. Click + button at the bottom of window. "Edit Rule" dialog opens:
  
  1. Select "Filter" button and type Tadesse("Commodity") in text field
  2. Click "Simple marker" and
    • Set "Color" field to transparent
    • Select "No Pen" from dropdown for "Stroke style"
    • This defines a transparent symbol as the default symbol for all items in the layer.
      This symbol *must* be transparent otherwise it will be superimposed on custom symbols we are now going to define.

    The dummy symbol is now defined.
  3. Close dialog to return to Symbology tab.
  
  
  1. The new rule is displayed. Select it.
  2. From "
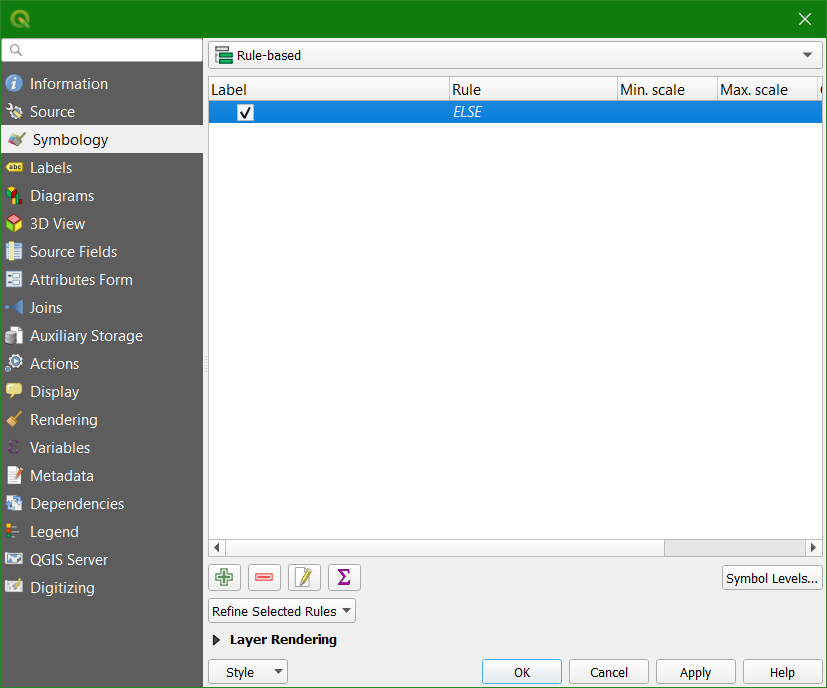
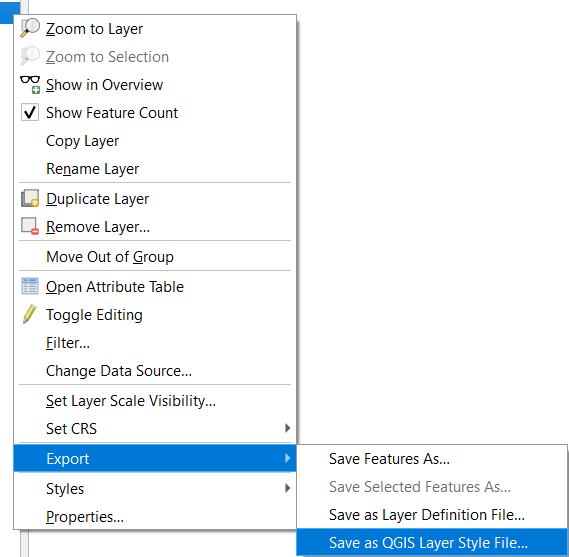
Refine Selected Rules" button, select "Add Categories to Rule" to open its window.
  3.    

  1. In "Column" line type: "
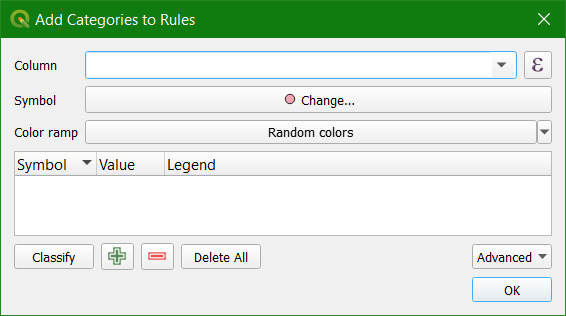
Tadesse("Commodity")". This is the rule to produce symbols.

  2. But the symbol shape is unique (circle filled with random colours)!
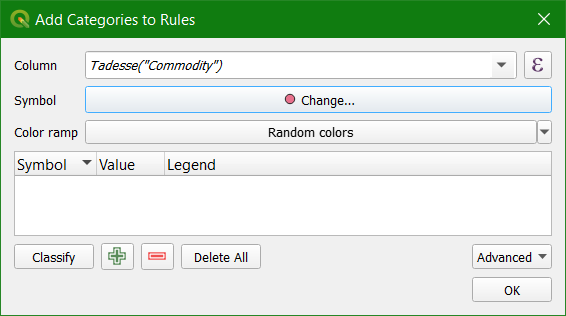
  3. The good thing is that each symbol value is the name of a symbol present in Style Manager.

  4. Now we need to associate symbol name to an actual symbol:
    • Click "
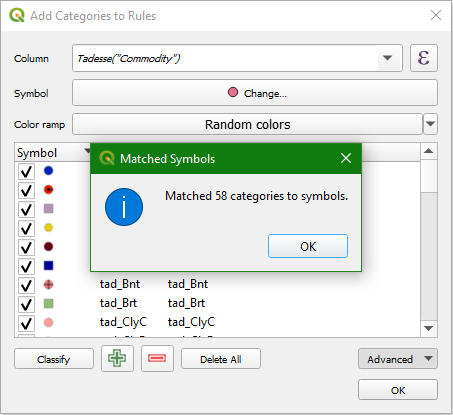
Advanced" -> "Match to Saved Symbols"
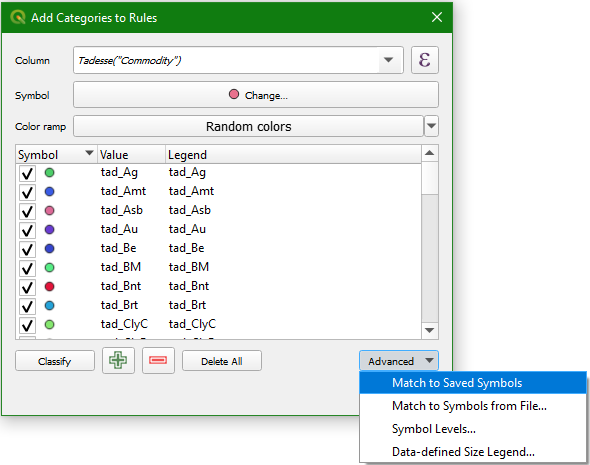
    • QGIS tells us the number of unique matches found
    • And voilĂ , the symbols shape follow the value of "Commodity" field:
      • Almost done! We need to define the size of each symbol depending on the value of the "Class" field.
        • Select all symbol entries from the list
        • Right-click the selection and click "Change Size..."
        • In the dialog shown click icon and then "Edit..."
        • In the "Expression" tab type the following code:
        • CASE
          WHEN @map_scale < 500000 THEN
             CASE
              WHEN
                "Class" = 'A' THEN 20
              WHEN
                "Class" = 'B' THEN 16
              WHEN
                "Class" = 'C' THEN 12
              WHEN
                "Class" = 'D' THEN 8
              ELSE
                4
            END
          WHEN @map_scale >= 500000 THEN
             CASE
              WHEN
                "Class" = 'A' THEN 10
              WHEN
                "Class" = 'B' THEN 8
              WHEN
                "Class" = 'C' THEN 6
              WHEN
                "Class" = 'D' THEN 4
              ELSE
                2
            END
          END

          And click "OK".
          Here we map the value of "Class" field to symbol size and we introduce a scale dependency: everything below 500 000 will show symbols twice as big as scales greater than 500 000.


    1. Note that symbology "Label" field is not what we want, its is just the name of the applied rule. We need to change it to commodity name.
    2. Right click layer name in layer pane then "Export" -> "Save as QGIS Layer Style File..." and give a filename, remember where it is.
    3. Open the style file (.qml) with a text editor and use the replace function to get rid of unwanted text in the Label="" field of each entry.
    4. Save modified file.
    5. Load style for layer.
    6. Done.

    Side note

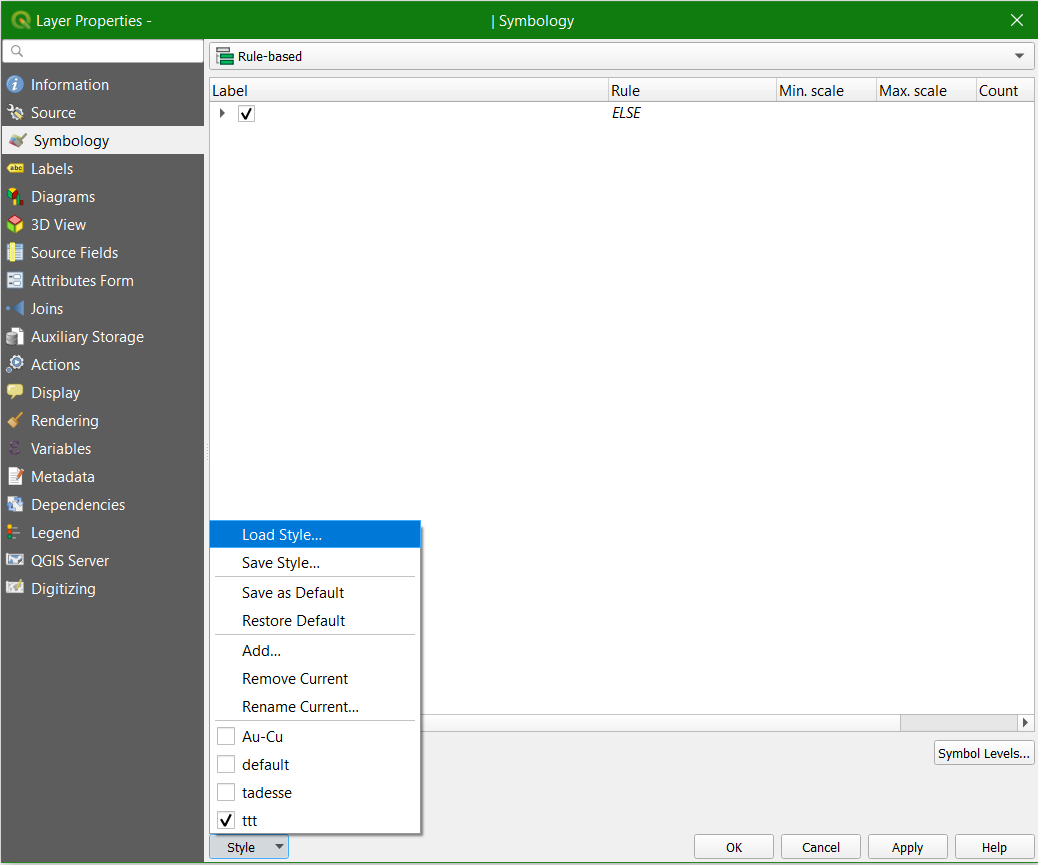
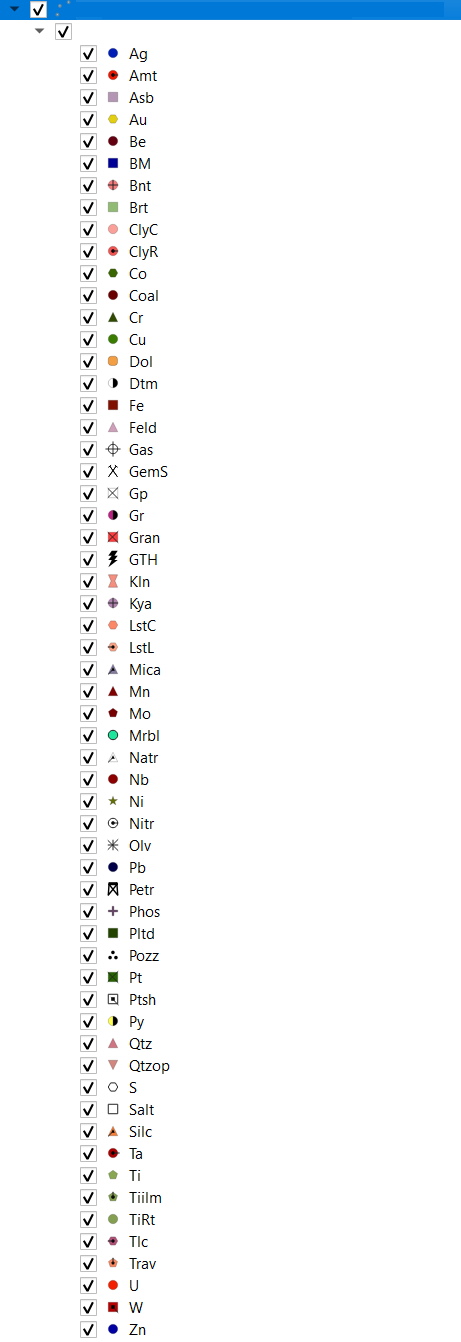
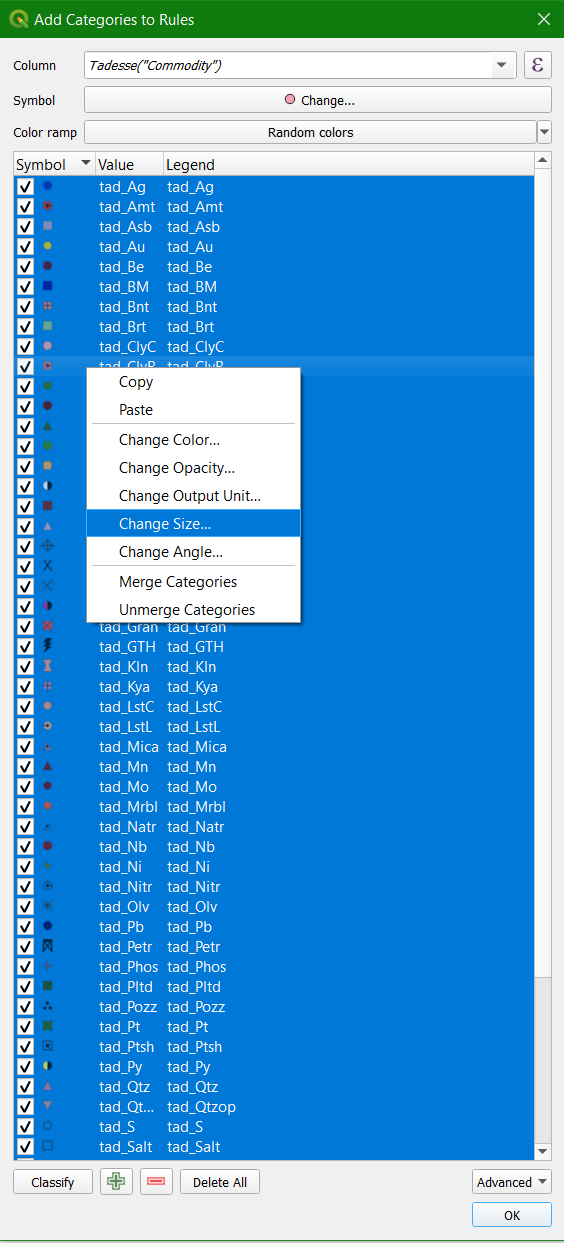
    Using the multi-style capability of QGIS one can copy the style defined above and modify it to only show selected commodities.

    For example, the following image shows that only two commodities have been kept. All other commodities have been removed ()

    Note that entries can be rearranged by dragging them up and down the stack and multiple entries can be selected.

    Also the "Label" can be changed to something more meaningful.


    Published date: 11 Dec 2019.