Please note: This page will not display correctly in small-sized frames!
A 9-step method to style a field in QGIS to its colour style in MapInfo
In QGIS, when importing a vector file from MapInfo its styling/symbology is lost. This is quite a problem that the plugin openWOR was trying to address by importing the MapInfo workspace (.wor). But since the disapearance of that plugin from the official QGIS repo another way of styling is required(1).
The following describes a 9-step method to do just that. The method does not cater for patterns yet, only solid colours. Patterns could be added in a different number of ways that could be the subject of another post.
Prerequisite:
- Large colour image (raster) of the vector layer we want to import in QGIS. Image format must be uncompressed (.tif, .bmp) or lossless compressed (.png). Lossy compressed images (.jpeg) are not really suitable. MapInfo ProViewer can be used to create this raster.
What's needed:
- QGIS 2.18
- Georeferencer plugin (native, needs to be enabled)
- Open Attribute Table (native, needs to be anabled)
- Point on surface (native, in processing)
- Point sampling tool (plugin to be downloaded)
- 1 -
Import MapInfo TAB into QGIS (e.g. drap&drop the .TAB file from Explorer to the "layers Panel").
Open the 'Properties' dialog and create 3 new fields (how to...)
: colour_R, coulour_G, colour_B and save.


 D) repeat for the two other colours:
- 2 -
Georeference the raster image representing the layer correctly styled.
Do not save transparency colour: uncheck "Use 0 for transparency when needed" in the 'Transformation settings' dialog of the Georeferencer.
- 3 -
Thus, vector and raster files should "perfectly" overlay on each other.
Put the raster below the vector in the layers stack.
- 4 -
Using the vector layer, run "Point on surface" from Processing->QGIS geoalgorithms->Vector geometry tools (how to...)
Save the result as a shapefile.
Check that all points are correctly located inside their respective polygon (example).


- 5 -
Hide all layers in the 'Layers Panel', then only show the raster and the newly created point vector layers and select the latter.
- 6 -
Run 'Point sampling tool' (how to...) (this is a plugin to be downloaded):
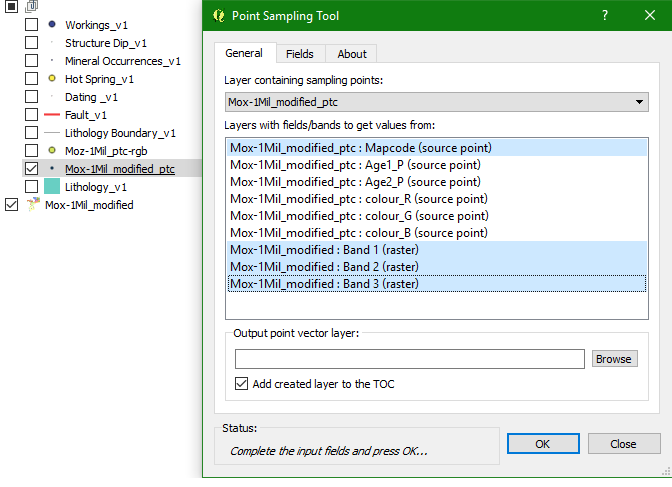


- In field "Layer containing sampling points:" select the newly created point layer.
- In the "Layers with fields/bands to get values from:" select one field from the vector layer that has unique values and select the three bands of the raster.
- In the "Fields" tab rename the three raster bands as R, G & B.
- Check "Add created layer to the TOC".
- Save to a new point shapefile and run.
- 7 -
Time to join layers.
Open the MapInfo vector layer's 'Properties' and go to the "Joins" tab (how to...).
Click the + button.
Select the last created point layer in the "Join layer" dropdown.
In the "Join field" select the field you've selected in step 4 above.
Select the same field in the "Target field".
Leave option boxes as their default values and run.


- 8 -
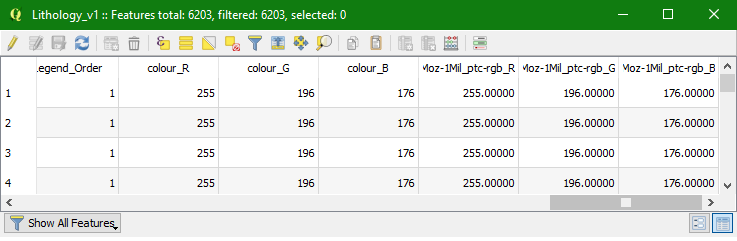
Open 'Open Attribute Table' (how to...) and check that the join has created 3 new fields named 'layername_R', 'layername_G' and 'layername_B', where layername is the name of the layer.


Enter edit mode (click the pen icon ![]() )
)
Now, using the "Open field calculator" run the three queries below:
- Check "Update existing field" and select 'colour_R'
In the expression pane type "R" and run the query. - Reopen 'Open Attribute Table' and check "Update existing field" and select 'colour_G'
In the expression pane type "G" and run the query. - Reopen 'Open Attribute Table' and check "Update existing field" and select 'colour_B'
In the expression pane type "B" and run the query.
Save and get out of edit mode
- 9 -
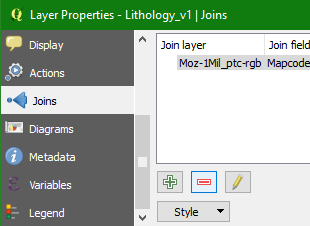
A) Open the 'Properties' dialog, go to the "Joins" tab and delete the join (how to...)
B) And it's time to style the layer (how to...):
Go to the "Style" tab and select: 'Single symbol' from the top drop-down list.
Double-click the coloured squared to open its properties.
Click on "Simple Fill"
Click the "Data defined override" button at the right of the "Fill" field
Click "Edit..." under Expression
and in the Expression field type:
color_rgb("colour_R","colour_G","colour_B")
and click 'Ok' twice.


And voilà, the layer is styled according to the original colours (not patterns!)...
Styled vector layer (end result):
click image to enlarge
Original MapInfo data (raster):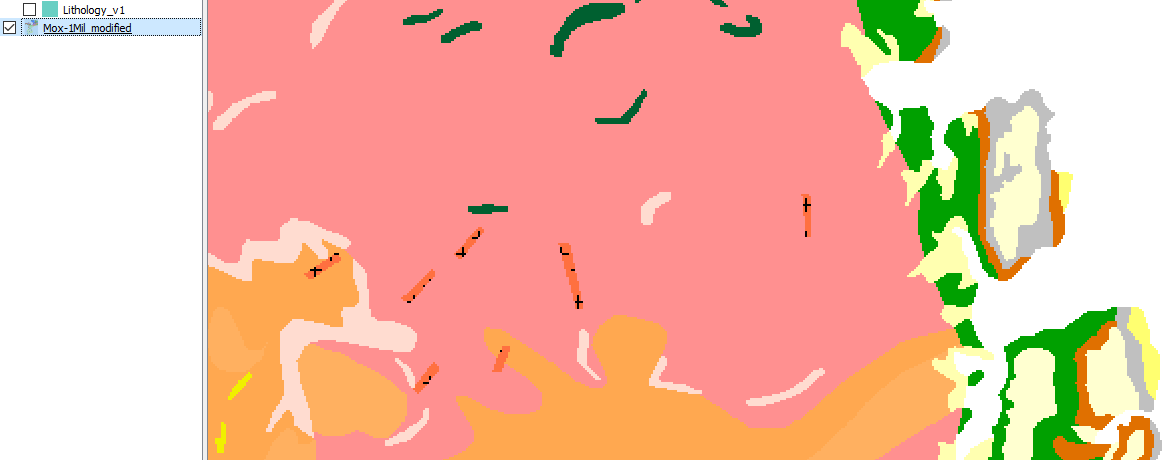
click image to enlarge
Possible problems:
- if the join attribute is not unique then the value of the RGB fields can be badly messed up!
- if the raster is not correctly georeferenced, a small feature could end up having the colour of its surroundings!
- does not cater for patterns (as seen in the two figures above).
Note:
(1) openWOR is available in the following repository:
http://piece-jointe-carto.developpement-durable.gouv.fr/NAT002/QGIS/plugins/plugins.xml
After writing this post, I've tried openWOR on the MapInfo workspace that prompted the development of this method. Well, the results of openWOR were quite unsatisfactory. My polygon layer ended up with no colour at all, not even patterns. It could be a version problem, that I had no time to investigate.